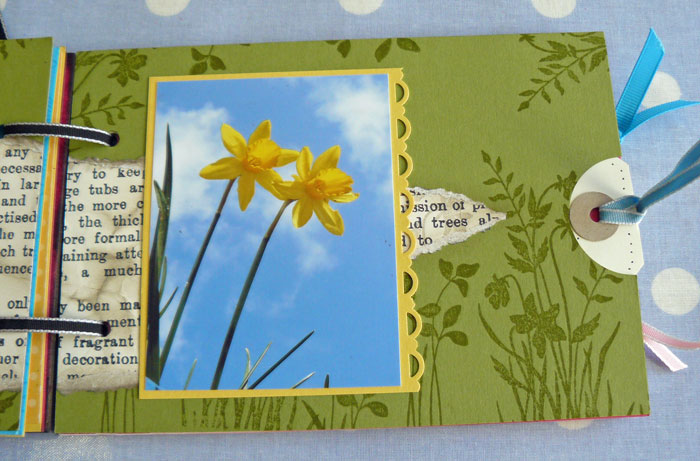
Wow, I can't believe February's Scrapbook Club project is FINISHED.. with just under three weeks to go! I really enjoyed making this month's project - it's a very clean-and-simple chipboard album on the theme of Love.
The album is dedicated to my very male-dominated family, so rather than going for pinks and reds I've used a colour palette of Baja Breeze and Certainly Celery - cardstock and Designer Series Papers - from Stampin' Up!'s gorgeous Subtles collection.
I've also made use of the Love You Much stamp set, which was perfect for this project, along with the coordinating Heart to Heart punch.
All my photos were edited in Picasa (Google's free and very user-friendly photo-editing software) - I cropped them into a square, converted them to black & white and added a blueish tint to coordinate with the Baja Breeze. I printed four to a sheet of A4 photo paper, then trimmed each one to approximately 4 inches, leaving a white border around each photo.
If you're coming along to Scrapbook Club this month - you'll need to bring five photos of someone or something you love (not necessarily your other half.. could be your whole family, as I did, or your pets, or your favourite foods! Whatever works for you, ok?). You can bring 6"x4" prints and crop them to a square shape if you like.. or try doing what I have described above in Picasa if you're feeling adventurous!
Homework!
It would be helpful if you can have a think about the colours you'd like to use in your album (choose two from the Subtles collection).. and also what album shape you want to use... your choice is Square (as I used - and much the easiest!), Tabbed or Bracket (see below).
If you can let me know by the end of this week, I'll be able to get your kit prepared in advance so you're ready to start the minute you arrive! I can't promise but I'll do my best to have your first choices here for you.
It's not too late to book your place!
I have spaces available for both Thursday 24th and Saturday 26th February's Scrapbook Club, so if you'd like to join in please get in contact with me today! Book your place by 10th/12th Feb to receive the discounted rate of £12 for the class (click on the Class Dates and Details page for further information on booking).
Finally.. don't forget, we have card-making classes this week - Thursday 10th and Saturday 12th February - we'll be using the Sale-a-bration sets Bliss and Punch Bunch, along with the Love You Much set shown above!
Hope to see you soon!
Sarah x
Upcoming Classes
Thursday 9th June: 10.00-12.30: Cardmaking.. cards for men using the Plane & Simple stamp set.
Thursday 23rd June: 9.30-12.30: Scrapbooking.. we'll be continuing with our 8"x8" mini book, theme: Book of Me!
Monday, 7 February 2011
Wednesday, 2 February 2011
Gotta love these colours!
Today I needed to make six very quick, simple cards with NO greeting on them... so after some deliberation, here's what I came up with: three in each colourway, butterflies in various papers from the Love Letter DSP pack.
You really can't go wrong with this colour scheme in my opinion! (In fact, it matches our new lounge decor.. coincidence? probably not!)
Riding Hood Red - Baja Breeze - Basic Black - Very Vanilla
Stamps: Very Vintage Stampin' Around Wheel
Punches: Scallop Trim Border; Butterfly
Designer Series Paper: Love Letter
Riding Hood Red - Baja Breeze - Basic Black - Very Vanilla
Stamps: Very Vintage Stampin' Around Wheel
Punches: Scallop Trim Border; Butterfly
Designer Series Paper: Love Letter
Tuesday, 1 February 2011
A New Home card using Neighbourhood Wheel and Aquapainters
Hi again!
Just wanted to share a card I made for my sister- and brother-in-law to celebrate their new home.
I used the Neighbourhood Jumbo Wheel and Stampin' Around Wheel Guide to stamp a couple of rows of houses on Very Vanilla cardstock. I then coloured one of the houses on the 'spare' row using Not Quite Navy, Blushing Bride and Old Olive ink from the Classic Stampin' Ink Pads and my new Aquapainters.
Tip: before opening your Ink Pad, squash it between your fingers and thumbs to transfer some of the ink from the pad to the lid. Then you can use this as a palette from which to pick up ink with your Aquapainter.
I then cut out the painted house and mounted it on foam pads onto the corresponding one on the row of houses. The houses were matted on to Pear Pizazz cardstock which was punched with the Scallop Trim Border punch. The base card is Peach Parfait, one of the In Colours.
Unable to resist adding a bit more detail, I stamped lots of little bees (from So Happy For You Sale-a-Bration set) in VersaMark ink as a background.
The sentiment was done on the computer and printed onto Very Vanilla cardstock.
I enjoyed painting the one little house so much, I'm tempted to go back and paint the others! But I'm trying to stay 'clean and simple' and there's always the risk I'll mess it up.. so I really should quit while I'm ahead. :o)
Have a lovely day!
Sarah x
Just wanted to share a card I made for my sister- and brother-in-law to celebrate their new home.
I used the Neighbourhood Jumbo Wheel and Stampin' Around Wheel Guide to stamp a couple of rows of houses on Very Vanilla cardstock. I then coloured one of the houses on the 'spare' row using Not Quite Navy, Blushing Bride and Old Olive ink from the Classic Stampin' Ink Pads and my new Aquapainters.
Tip: before opening your Ink Pad, squash it between your fingers and thumbs to transfer some of the ink from the pad to the lid. Then you can use this as a palette from which to pick up ink with your Aquapainter.
I then cut out the painted house and mounted it on foam pads onto the corresponding one on the row of houses. The houses were matted on to Pear Pizazz cardstock which was punched with the Scallop Trim Border punch. The base card is Peach Parfait, one of the In Colours.
Unable to resist adding a bit more detail, I stamped lots of little bees (from So Happy For You Sale-a-Bration set) in VersaMark ink as a background.
The sentiment was done on the computer and printed onto Very Vanilla cardstock.
I enjoyed painting the one little house so much, I'm tempted to go back and paint the others! But I'm trying to stay 'clean and simple' and there's always the risk I'll mess it up.. so I really should quit while I'm ahead. :o)
Have a lovely day!
Sarah x
January Prize Draw winner!
A BIG HUGE THANK YOU to all my lovely customers who have attended my classes and bought some fabulous Stampin' Up! products this past month. I so love this job! :o) I get to meet lots of lovely crafty ladies.. play around for hours dreaming up cards and scrapbook ideas for classes.. and do plenty of shopping for stash! (Even if I'm ordering for you, it's still exciting!)
I would love to see what you make with your new SU! purchases.. and I'd also really like to see your finished scrapbook projects too! If you'd like me to feature any of your cards, scrapbook pages or other projects made using SU! products that you've bought from me.. bring them along to your next class and I'll photograph them for the blog!
Now before I forget... the winner of the January Prize Draw is...
Helen Green!!
Congratulations, Helen - your prize will be included with your current order which is on its way!
The cards at the top of this post were commissioned by one of the parents at Charlie's school. They had to be quick and simple to make, so I used some scraps of Elegant Soiree DSP, along with strips of cardstock punched with the Scallop Trim Border punch, then added the greeting from So Happy For You (Sale-a-Bration set), punched out with the Word Window punch. The colour scheme is Baja Breeze, Soft Suede and Very Vanilla.
And finally... if you'd like to sign up for one of my February card-making classes (Thurs 10th and Sat 12th Feb), I'm holding the price at £8 until the end of Wednesday 2nd Feb (that's tomorrow night!) - so if you fancy coming, get in quick to secure your place at the discount rate!
Thanks for visiting!
Sarah x
Monday, 31 January 2011
Come and join me in February!
Hi there!
Fancy joining me for a card-making class or scrapbooking session in February? If so, now's the time to book your place.. I've just updated the Class Dates and Details page so you can see what's happening from now til June.
February's Card-making Classes take place on Thursday 10th and Saturday 12th February. These classes will be showcasing two more of the Sale-a-bration stamp sets - Bliss and Punch Bunch - along with the chance to make a Valentine card using the very sweet Love You Much stamp set!
Scrapbook Club this month takes place on Thursday 24th and Saturday 26th February.. and we'll be continuing with the Love theme by making a chipboard album dedicated to someone (or something) special. You will be able to customise your kit using any of the colours from the delicious Subtles Collection - and use the fabulous Stampin' Up! Colour Coach to help you devise your perfect colour scheme!
Just a quick reminder, too, that Sale-a-Bration is now half-way through! You have til 28th February to earn yourself a FREE stamp set.. if you'd like more information, please check out my previous post here - and then click on the Sale-a-Bration label in the side-bar to see plenty of projects made using the sets on offer. If you would like a Sale-a-Bration leaflet, email me with your address and I'll send you a copy!
I'll be back tomorrow to announce the winner of January's Prize Draw.. good luck everyone!
And finally...
A birthday card for a friend's little girl.. happy birthday Rosie!
Colours: Pear Pizazz, Melon Mambo, Tempting Turquoise, Pretty in Pink.
Stamps: Punch Bunch (Sale-a-Bration), Party This Way, Just Perfect alphabet
DSP: Brights Designer Series Paper Pattern Stack (Daffodil Delight)
Thanks for your visit!
Sarah x
Fancy joining me for a card-making class or scrapbooking session in February? If so, now's the time to book your place.. I've just updated the Class Dates and Details page so you can see what's happening from now til June.
February's Card-making Classes take place on Thursday 10th and Saturday 12th February. These classes will be showcasing two more of the Sale-a-bration stamp sets - Bliss and Punch Bunch - along with the chance to make a Valentine card using the very sweet Love You Much stamp set!
Scrapbook Club this month takes place on Thursday 24th and Saturday 26th February.. and we'll be continuing with the Love theme by making a chipboard album dedicated to someone (or something) special. You will be able to customise your kit using any of the colours from the delicious Subtles Collection - and use the fabulous Stampin' Up! Colour Coach to help you devise your perfect colour scheme!
Just a quick reminder, too, that Sale-a-Bration is now half-way through! You have til 28th February to earn yourself a FREE stamp set.. if you'd like more information, please check out my previous post here - and then click on the Sale-a-Bration label in the side-bar to see plenty of projects made using the sets on offer. If you would like a Sale-a-Bration leaflet, email me with your address and I'll send you a copy!
I'll be back tomorrow to announce the winner of January's Prize Draw.. good luck everyone!
And finally...
A birthday card for a friend's little girl.. happy birthday Rosie!
Colours: Pear Pizazz, Melon Mambo, Tempting Turquoise, Pretty in Pink.
Stamps: Punch Bunch (Sale-a-Bration), Party This Way, Just Perfect alphabet
DSP: Brights Designer Series Paper Pattern Stack (Daffodil Delight)
Thanks for your visit!
Sarah x
Friday, 28 January 2011
Inspired by Orla
One of my Scrapbook Club ladies arrived yesterday with a brand new Orla Kiely-designed shopping bag from Tesco - only £4 would you believe!
I'd heard something about these bags but, as I don't do the shopping very often (shamefully bad wife that I am), I hadn't actually seen one. Well, I just had to have one! So I sent Gareth off to Tesco's last night with strict instructions to come back with an Orla bag.. never mind the groceries, I need an Orla shopping bag! ;o)
Bless him, he managed to procure one for me...
LOVE the pattern... LOVE that colour scheme! INSPIRED to create something!!
When you get into Stampin' Up!, a strange thing happens.. pretty soon you start thinking in SU! colours. When I saw this bag, I instantly thought Poppy Parade; Old Olive; Basic Grey; Chocolate Chip. Then I thought, how can I 'borrow' this design? Well, here's what I did:
Now who said I couldn't do Clean & Simple?! (actually, it was me.) Well, it was a struggle, let me assure you (and I'm still tempted to go back and add bits).
I can see me coming back to this kind of simple design.. I admire it so much when I see it, so I'm not sure why I don't do it more often. Could be the way forward!
What kind of look do you prefer? Clean & Simple or Messy & Complicated?!
Sarah :o)
I'd heard something about these bags but, as I don't do the shopping very often (shamefully bad wife that I am), I hadn't actually seen one. Well, I just had to have one! So I sent Gareth off to Tesco's last night with strict instructions to come back with an Orla bag.. never mind the groceries, I need an Orla shopping bag! ;o)
Bless him, he managed to procure one for me...
LOVE the pattern... LOVE that colour scheme! INSPIRED to create something!!
When you get into Stampin' Up!, a strange thing happens.. pretty soon you start thinking in SU! colours. When I saw this bag, I instantly thought Poppy Parade; Old Olive; Basic Grey; Chocolate Chip. Then I thought, how can I 'borrow' this design? Well, here's what I did:
- Punch butterflies in the four colours
- Stamp over each one in Whisper White Craft Ink using the damask stamp from the Bliss Sale-a-bration set.
- Arrange them on a square of Very Vanilla cardstock, adhering with SNAIL adhesive.
- Turn over and cut off the overhanging bits with a sharp craft knife.
- Mount onto Poppy Parade card blank (mine was 5x5 inches square).
- Add greeting 'hello' from Tiny Tags stamp set to one of the butterflies.
Now who said I couldn't do Clean & Simple?! (actually, it was me.) Well, it was a struggle, let me assure you (and I'm still tempted to go back and add bits).
I can see me coming back to this kind of simple design.. I admire it so much when I see it, so I'm not sure why I don't do it more often. Could be the way forward!
What kind of look do you prefer? Clean & Simple or Messy & Complicated?!
Sarah :o)
Thursday, 27 January 2011
January Scrapbook Club - Project Complete!
As promised, here are a few more pictures of this month's Scrapbook Club project. A big thank you to the ladies who joined me this morning to have a go at the project.. I can't wait to see your finished books.. next month ok? :o)
So here's my cover:
My colour scheme is Melon Mambo, Tempting Turquoise, Daffodil Delight and Old Olive. All the patterned papers are from the Brights Designer Series Paper (DSP) Pack and the Newsprint DSP pack.
The 'g' is a chipboard letter, inked and coated in Crystal Effects to make it shiny. The other letters (and numbers) were die-cut on my Cuttlebug. The tiny butterflies are from the 'So Happy For You' (Sale-a-bration) set.
First two pages:
{Eek! Wish I'd not left a 'halo' effect round my hair.. oops!}
I've used the Bliss (Sale-a-bration) set to stamp the background.
Thought I'd try doodling my title letters and the speech bubble (being more adventurous already, see? lol).
Second two pages (I showed you the pair yesterday, so here they are individually):
I used 'faux stitching' around the edges of the dotty paper - used the paper piercing template from the Mat Pack to pierce holes all the way round, then joined them up with a black journaling pen.. simple!
The bunting was made using a stamp from 'Party This Way', strung together with Linen Thread.
Third pair of pages:
The background was stamped with 'Sweet Summer' (another Sale-a-bration set). I doodled the scalloped boxes straight on to the DSP, then cut them in half and flipped one side round to show the other pattern (the papers are all double-sided). I used the Paper Piercing Template to help me sew the pieces together.
Fourth pair of pages:
The background was stamped with 'Just Believe' stamps.
And finally..(phew, nearly there) the fifth pair of pages:
Here, I made a pocket from DSP, folded over and punched with the Scallop Trim Border punch, for my tags. The colourful strips at the top of these pages were sliced from the cover of a Dulux paint catalogue.. appropriate to the theme, I thought!
Pages were stuck together back-to-back on three sides to form pockets for my tags. I used a circle punch to cut the semi-circles to allow easy removal of the tags. The numbers on each page were cut from a sheet of Newsprint DSP.
I hope you liked my project! Saturday ladies.. now you know what you have in store! ;o)
If you have any questions, please don't hesitate to ask in the Comments box (by the way, anyone should be able to comment now.. I've changed the settings!).
Thanks for visiting,
Sarah x
So here's my cover:
My colour scheme is Melon Mambo, Tempting Turquoise, Daffodil Delight and Old Olive. All the patterned papers are from the Brights Designer Series Paper (DSP) Pack and the Newsprint DSP pack.
The 'g' is a chipboard letter, inked and coated in Crystal Effects to make it shiny. The other letters (and numbers) were die-cut on my Cuttlebug. The tiny butterflies are from the 'So Happy For You' (Sale-a-bration) set.
First two pages:
{Eek! Wish I'd not left a 'halo' effect round my hair.. oops!}
I've used the Bliss (Sale-a-bration) set to stamp the background.
Thought I'd try doodling my title letters and the speech bubble (being more adventurous already, see? lol).
Second two pages (I showed you the pair yesterday, so here they are individually):
I used 'faux stitching' around the edges of the dotty paper - used the paper piercing template from the Mat Pack to pierce holes all the way round, then joined them up with a black journaling pen.. simple!
The bunting was made using a stamp from 'Party This Way', strung together with Linen Thread.
Third pair of pages:
Fourth pair of pages:
The background was stamped with 'Just Believe' stamps.
And finally..(phew, nearly there) the fifth pair of pages:
Here, I made a pocket from DSP, folded over and punched with the Scallop Trim Border punch, for my tags. The colourful strips at the top of these pages were sliced from the cover of a Dulux paint catalogue.. appropriate to the theme, I thought!
Pages were stuck together back-to-back on three sides to form pockets for my tags. I used a circle punch to cut the semi-circles to allow easy removal of the tags. The numbers on each page were cut from a sheet of Newsprint DSP.
I hope you liked my project! Saturday ladies.. now you know what you have in store! ;o)
If you have any questions, please don't hesitate to ask in the Comments box (by the way, anyone should be able to comment now.. I've changed the settings!).
Thanks for visiting,
Sarah x
Subscribe to:
Posts (Atom)