Upcoming Classes

Thursday 9th June: 10.00-12.30: Cardmaking.. cards for men using the Plane & Simple stamp set.
Thursday 23rd June: 9.30-12.30: Scrapbooking.. we'll be continuing with our 8"x8" mini book, theme: Book of Me!
Showing posts with label Party This Way. Show all posts

Monday, 31 January 2011

Come and join me in February!

Hi there!

Fancy joining me for a card-making class or scrapbooking session in February? If so, now's the time to book your place.. I've just updated the Class Dates and Details page so you can see what's happening from now til June.

February's Card-making Classes take place on Thursday 10th and Saturday 12th February. These classes will be showcasing two more of the Sale-a-bration stamp sets - Bliss and Punch Bunch - along with the chance to make a Valentine card using the very sweet Love You Much stamp set!

Scrapbook Club this month takes place on Thursday 24th and Saturday 26th February.. and we'll be continuing with the Love theme by making a chipboard album dedicated to someone (or something) special. You will be able to customise your kit using any of the colours from the delicious Subtles Collection - and use the fabulous Stampin' Up! Colour Coach to help you devise your perfect colour scheme!

Just a quick reminder, too, that Sale-a-Bration is now half-way through! You have til 28th February to earn yourself a FREE stamp set.. if you'd like more information, please check out my previous post here - and then click on the Sale-a-Bration label in the side-bar to see plenty of projects made using the sets on offer. If you would like a Sale-a-Bration leaflet, email me with your address and I'll send you a copy!

I'll be back tomorrow to announce the winner of January's Prize Draw.. good luck everyone!

And finally...


A birthday card for a friend's little girl.. happy birthday Rosie!

Colours: Pear Pizazz, Melon Mambo, Tempting Turquoise, Pretty in Pink.
Stamps: Punch Bunch (Sale-a-Bration), Party This Way, Just Perfect alphabet
DSP: Brights Designer Series Paper Pattern Stack (Daffodil Delight)

Thanks for your visit!

Sarah x

Thursday, 27 January 2011

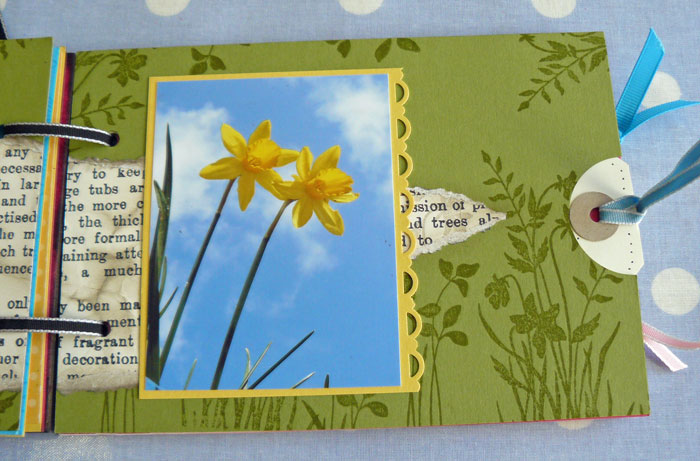
January Scrapbook Club - Project Complete!

As promised, here are a few more pictures of this month's Scrapbook Club project. A big thank you to the ladies who joined me this morning to have a go at the project.. I can't wait to see your finished books.. next month ok? :o)

So here's my cover:


My colour scheme is Melon Mambo, Tempting Turquoise, Daffodil Delight and Old Olive. All the patterned papers are from the Brights Designer Series Paper (DSP) Pack and the Newsprint DSP pack.

The 'g' is a chipboard letter, inked and coated in Crystal Effects to make it shiny. The other letters (and numbers) were die-cut on my Cuttlebug. The tiny butterflies are from the 'So Happy For You' (Sale-a-bration) set.

First two pages:

{Eek! Wish I'd not left a 'halo' effect round my hair.. oops!}


I've used the Bliss (Sale-a-bration) set to stamp the background.

Thought I'd try doodling my title letters and the speech bubble (being more adventurous already, see? lol).

Second two pages (I showed you the pair yesterday, so here they are individually):


I used 'faux stitching' around the edges of the dotty paper - used the paper piercing template from the Mat Pack to pierce holes all the way round, then joined them up with a black journaling pen.. simple!

The bunting was made using a stamp from 'Party This Way', strung together with Linen Thread.

Third pair of pages:


The background was stamped with 'Sweet Summer' (another Sale-a-bration set). I doodled the scalloped boxes straight on to the DSP, then cut them in half and flipped one side round to show the other pattern (the papers are all double-sided). I used the Paper Piercing Template to help me sew the pieces together.

Fourth pair of pages:


The background was stamped with 'Just Believe' stamps.

And finally..(phew, nearly there) the fifth pair of pages:


Here, I made a pocket from DSP, folded over and punched with the Scallop Trim Border punch, for my tags. The colourful strips at the top of these pages were sliced from the cover of a Dulux paint catalogue.. appropriate to the theme, I thought!

Pages were stuck together back-to-back on three sides to form pockets for my tags. I used a circle punch to cut the semi-circles to allow easy removal of the tags. The numbers on each page were cut from a sheet of Newsprint DSP.

I hope you liked my project! Saturday ladies.. now you know what you have in store! ;o)

If you have any questions, please don't hesitate to ask in the Comments box (by the way, anyone should be able to comment now.. I've changed the settings!).


Thanks for visiting,

Sarah x

Sunday, 23 January 2011

A couple of Punch Bunch cards

Been so busy creating things this week I haven't had a chance to share.. so here's a couple of quick and easy cards I made for two little boys' birthdays:


Both cards use Designer Series Paper scraps from the Celebrations pack - just perfect for kiddies' birthdays with its bright primary colours and bold patterns!

  • I stamped the Owl from 'Punch Bunch' in Pacific Point ink directly on to the white cardstock. 
  • To make the balloon, I stamped the balloon from 'Party This Way' on to a scrap of Bashful Blue cardstock and cut it out. I then cut out numbers from a sheet of Celebrations DSP and stuck them on the unstamped side of the balloons.
  • The greeting is from the lovely Sale-a-bration set, 'So Happy for You' - just love the cheerful font!
  • I cut the leaves using the Two-Step Bird punch and Pear Pizazz cardstock.
  • On the second card I stuck on some googly eyes from a craft shop - super cute!
Remember, Sale-a-bration stamp sets are only available through January and February - they will not be appearing in future Stampin' Up! Idea Book & Catalogues!

If you like the Owl stamp but don't fancy cutting him out - good news! There will be a punch to match the Owl stamp in the Stampin' Up! Mini-Catalogue, which comes out on 1st April. It's going to be a two-step punch, so you can piece together your owl's body, wings and eyes in whatever colour combinations you like.

Thanks for looking!


Sarah x

Saturday, 18 December 2010

Scrapbook Club - undaunted by snow!

Well, it was touch and go this morning... should I call off Scrapbook Club or carry on regardless of the white stuff? In the end, thanks to a few quick phone calls, we decided to go ahead. Thank you ladies for braving the elements - we had snow, hailstones like marbles and the occasional blizzard, but nobody batted an eyelid!

So this month's project was a Birthday Planner, to help us keep on top of all those birthdays and other occasions throughout the year which call for a hand-crafted card to be made and sent with love. Here's my creation:

It took me a good couple of weeks to get this project finished.. and a lot of trial and error.. but I'm pleased with how it turned out - and even more thrilled with how the ladies managed to create theirs today in under three hours! It was pretty intense work but worth the effort I think.

Here's a peek at the first two inside pages, showing the calendar for January on the left and a pocket for holding a couple of cards on the right...

...and the little pocket at the back - for storing envelopes or maybe a little address book..?


I've made a few changes to the class schedule from January onwards... full details can be found on the Card-making Classes and Scrapbook Club pages in the side-bar... take a look and do book early to benefit from early-bird discounts and to secure your place!

Details of class projects for the next few months will be available soon.. or at least as soon as I've finished my Christmas cards and thought about what we're eating one week from today..!

Merry Christmas everyone.. and I hope to see you soon! :o)