Upcoming Classes

Thursday 9th June: 10.00-12.30: Cardmaking.. cards for men using the Plane & Simple stamp set.
Thursday 23rd June: 9.30-12.30: Scrapbooking.. we'll be continuing with our 8"x8" mini book, theme: Book of Me!

Wednesday 22 June 2011

Introducing... Stamping Obsession!

Hiya folks,

It's been a bit quiet over here lately.. that's because I've been busy (..that should read VERY busy..) working on a new website.. called Stamping Obsession! Who knew websites could absorb so many hours.. and days.. and even weeks!!!

Anyway.. my idea was to offer Stampin' Up! products in a slightly different format.. as well as the normal way, of course! :o)


Some time ago I realised that, even though my customers loved Stampin' Up!'s gorgeous Designer Series Papers, they don't very often buy the coordinating cardstock.. or ribbons.. or buttons. Which is a shame really, as the products are designed to fit so beautifully together.

It occurred to me that most of my customers couldn't justify buying a whole pack of cardstock in each colour to match their chosen Designer Series Papers.. or a whole roll of ribbon.. or several packs of buttons. More product than they would ever use..? Or simply too expensive!


So I thought it would be a good idea to put together kits containing just the right amount of products... Designer Series Papers - cardstock in coordinating colours (12x12 or A4 - you can choose!) - a selection of ribbon - buttons - and other embellishments as appropriate!


I've called them Crafty Kits and they will be available on a monthly subscription basis.. with some lovely subscriber benefits... or for individual purchase, subject to availability. As well as a box full of yummy goodies, you'll also receive a PDF of Crafty Kits Project Ideas.. so you won't be short of inspiration.

The first Crafty Kit is based on Springtime Vintage Designer Series Papers and is available for order RIGHT NOW!
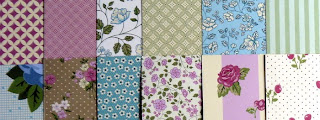

If you'd like to find out more, please hop across to Stamping Obsession where you can find out all the details! To keep up to date with all the latest news and special offers, you might like to subscribe to new posts by RSS or Email.. or to my Newsletter!

I hope to see you at Stamping Obsession soon.. it's a work in progress so any feedback would be welcomed with open arms!

Happy crafting,

Sarah :o)

Thursday 2 June 2011

Lots of distressing with Notably Ornate stamps!

 One of my fellow Stampin' Up! demonstrators recently organised a card swap on the In Love With Stamping forum.. the brief was simply to use your favourite stamp set to create a card. It was a tough challenge.. which stamps to choose?

Eventually I chose a set from the main Idea Book & Catalogue.. Notably Ornate. I love this set as it just cries out for plenty of distressing.. it's always fun to get a bit messy, right?


I used two invaluable tools in the planning of my card - the Idea Book & Catalogue to get some inspiration and the Colour Coach to choose a colour scheme. I was inspired by a lovely card in the IB&C which used the Nature's Nest stamp set.. and chose the colour combination Cherry Cobbler, More Mustard and Baja Breeze (I added Crumb Cake and Very Vanilla as my neutrals).


After making my card, I set about preparing all the bits and pieces I would need to make ten more! It's much easier to do this in a production-line style rather than making each complete card in turn.


  • I stamped the birds using the 'rock & roll' technique: inking up the stamp with Baja Breeze ink, then rolling the wing tips and beak on to a Not Quite Navy ink pad for contrast.
  • I made the tags from Very Vanilla cardstock, then stamped the label stamp over it using Crumb Cake ink. I then distressed the edges using a Distressing tool and sponged them with Tea Stain distress ink from the SU! Distressing Kit. The corners of the tag were curled and creased for an extra vintage effect!
  • Strips of Newsprint Designer Series paper were also aged by sponging with Tea Stain distress ink. The pieces of Crumb Cake cardstock were roughly torn before being crumpled up and inked direct-to-paper using the Tea Stain ink again.
  • Once all the cards were assembled, I spritzed the whole lot using the Early Espresso marker pen and the Colour Spritzer tool. It's so exciting seeing your work covered in tiny dots of colour... or maybe that should read horrifying if you love your cards clean and perfect! I have to admit, I love the extra detail (and yes, the mess!) the spritzer creates.

So here's the finished card...

Looks like I'm over that Clean & Simple phase I was going through... for a while at least..

Happy stamping!

Sarah :o)

Wednesday 1 June 2011

EXTRA, EXTRA... Hostess Rewards!


Extra! Extra! Stampin’ Up! hostesses get extra hostess rewards 1 June-31 July, in addition to the already fantastic hostess benefits!

From 1 June-31 July, Stampin’ Up! hostesses can earn an EXTRA £20 to use toward Stampin’ Up! products of their choice when they host a workshop totaling £250 or more in product sales!
This extra benefit is in addition to the standard hostess benefits they receive when they host a workshop.

As a Stampin' Up! hostess, you will receive:
  • a FREE Idea Book & Catalogue (and mini catalogue when available)
  • a FREE Hostess-exclusive stamp set of your choice when workshop sales reach £150 or above
  • FREE merchandise from the Idea Book & Catalogue (or mini catalogue) with a total value depending on workshop sales.
So here's what you could receive when you host a workshop in June and July (don't forget, this is in addition to your choice of Hostess-exclusive stamp set!):


Workshop total product sales (before shipping and handling)
Free
Stampin’ Up! merchandise

Extra, Extra hostess rewards 
Free Stampin’ Up! merchandise with
Extra, Extra
hostess rewards 
£250 - £299
£25
+
£20
£45
£300 - £349
£35
+
£20
£55
 £350 - £399
£40
 +
£20
£60
 £400 - £449
£45
 +
£20
£65
 £450 - £499
£50
 +
£20
£70
 £500 - £549*
£60
 +
£20
£80
* The Extra, Extra Hostess Rewards apply to all workshops above £250; to see hostess benefits for workshops totaling £550 and above, visit the Hostess Benefits web page on the Stampin' Up! website.

These wonderful hostess rewards are only one benefit of hosting a workshop. When you host a workshop, you also get to spend quality crafting time with your friends and family, as well as learn exciting new crafting techniques and project ideas.

Your workshop can be as simple or as elaborate as you want it to be. It can be a casual stamping night for you and your friends, a party with food, drinks and music while you stamp, or even a structured stamping class.. just let me know what you have in mind and I'll help you to make it happen!

Book your Stampin' Up! workshop with me now.. call me on 01323 730296.. or email me on slpiggott73@gmail.com.

I look forward to stamping with you soon!

Sarah :o)

Sunday 29 May 2011

Scrapbook Mini Book: two more pages

When I was a little girl, my cousin Clare and I were obsessed with horses and ponies. Between us, we accumulated a herd of Sindy and Barbie horses and made them stables from cardboard boxes, showjumps from sticks and bridles from wool. Later on, we went on fantastic horse-riding holidays in Somerset and just had the *best* fun together!

I wanted to record these happy times in my 'This is Me!' mini book.. so here's a double-page spread documenting my horsey phase..


Supplies:
Cardstock - Pear Pizzazz, Peach Parfait, Soft Suede, Pumpkin Pie (the die-cut heart)
DSP - In Colors 6"x6" Designer Paper Stack (Hostess exclusive)
Tools - Big Shot (£87.95), Timeless Type Alphabet dies (£65.95), Top Note die (£18.95), Lots of Tags dies (£18.95)
Accessories - Certainly Celery Brads (from Subtles Brads collection, £6.25 for 100)

Thanks for visiting!

Sarah :o)

Happy Birthday Mum - a card and a jewellery project!

It's my Mum's 60th today.. so a huge Happy Birthday if you're reading, Mum!

Here's the card I made for her..


Supplies for the card:
Cardstock - Confetti White, Rose Red, Blushing Bride, Concord Crush, Certainly Celery
Dies - Flower: Daisies #2, Beautiful Wings Embosslits
Punch - Build a Blossom (for the leaf)
Stamps - Curly Cute (Happy Birthday), non-SU! tiny stamp set (MUM).
Accessories - Daffodil Delight Button from Brights Designer Buttons set, Linen Thread

And here's Mum's present - it's a necklace and earrings set I made using a kit from The Eastbourne Bead Company. (Actually I made the earrings using a few leftover beads and some earring findings I had in my crafty stash.)


It's not as short as it looks in the photo.. I doubled it up so I could fit it in an envelope! The necklace was pretty easy to make and I managed it in two or three hours. It's made from these gorgeous shiny shell beads, threaded onto pink cord with knots before and after each one to hold them all in place, four strands altogether. In hindsight I would have made it a bit shorter, or perhaps added another strand.. but hey, it's not bad for a first attempt!

While I was at the Bead Company shop, I couldn't resist buying another kit, for a silver charm bracelet complete with LOTS of very similar shell beads attached on jump rings. It'll be fantastic when it's finished but, having started it last night, I can tell it's going to take a LOT longer than Mum's necklace. Those tiny jump rings are slippery little blighters and I keep dropping them..

Have a lovely day!

Sarah :o)

Friday 27 May 2011

Scrapbook Mini Book Class: Thurs 26th May

Hello again!

Just thought I'd share a work-in-progress with you.. it's a mini-book called 'This is Me!' and was the subject of this month's Scrapbook class which took place yesterday morning. Thank you to the ladies who attended the class.. it was a productive and enjoyable morning, and as usual I was thrilled to see how your ideas took shape.

So here are my pages so far...

First the front cover:

  • To make the covers, carefully cut some cardboard (the type that's corrugated on the inside and flat on the outsides) into squares of 8-1/2 x 8-1/2 inches. You'll need a metal ruler and a large cutting mat.
  • Cut your chosen Designer Series Paper to 11-1/2 inches square, then place your cardboard square in the centre. Mark all around with a pencil then cut off the corners of the paper just at the point where your pencil lines come together (to form mitred corners). 
  • Fold the flaps over the cardboard and secure tightly with Sticky Strip.
  • Cover the inside of your cardboard cover with a sheet of DSP or cardstock cut to a tiny bit less than 8-1/2 inches square.
  • Punch holes with a regular hole punch or Crop-a-Dile .
  • Decorate your cover as you like!
Supplies:
Cardboard
Designer Series Paper: Greenhouse Garden (£8.75 for 12 sheets)
Cardstock: Daffodil Delight, Baja Breeze, Pear Pizzazz, Pumpkin Pie, Real Red, Chocolate Chip (£6.25 for 24 smooth sheets)
Tools: Big Shot (£87.95), Timeless Type Alphabet Dies (£65.95), Beautiful Wings Embosslits (£10.50), Flower - Daisies #2 (£16.95)

Now for the first two pages of my mini-book:

All the details of my birth are tucked away in the scalloped envelope for a bit of privacy! The pages are cut to 8 inches square.

Supplies:
Cardstock: Regal Rose, Pear Pizzazz, Chocolate Chip, Confetti White
DSP: Nursery Suite Specialty DSP (£9.95 for 12 sheets)
Accent Stickers: Nursery Suite (£7.50 for 2 sheets)
Tools: Big Shot, Timeless Type Alphabet, Lots of Tags Sizzlits dies (£18.95), Scallop Envelope die (£18.95)
Accessories: Linen Thread (£3.75 for 13.7m)

And the second pair of pages...


In these pages, I've simply layered three wide strips of Designer Series Papers, along with one of the border stickers from the Nursery Suite Quick Accents pack.

Supplies:
Cardstock: Regal Rose, Confetti White, Chocolate Chip
DSP: Nursery Suite, Subtles DSP stack (So Saffron polka dot) (£15.50 for 40 sheets)
Accent stickers: Nursery Suite Quick Accents
Tools: Big Shot, Timeless Type alphabet, Beautiful Wings Embosslits, Circles #2 dies (£14.50)

I'll share another pair of pages very soon..

Our next Scrapbook class is on Thursday 23rd June when we'll be continuing with our mini books. Don't worry if you missed the first class, it'll be very easy to catch up! The project won't be completed in the next session but once you've got started it's something you can dip into as and when you feel like adding a page or two.

Fancy coming along? Contact me on slpiggott73@gmail.com or call me on 01323 730296 to book your place. I have two places left for this class so please book early to be sure of your spot!

Finally.. if you'd like to purchase any of the products used in this project, please don't hesitate to get in touch (details as above) and I'll happily place your order for you.

Thanks for visiting!

Sarah :o)

Quick cards with Longfellows hostess set

Phew, it's been a busy couple of weeks! I'll keep this one short and sweet.. a couple of very quick cards I made for friends' birthdays using the Stampin' Up! level 2 Hostess Set, Longfellows.


Supplies:
Cardstock - Confetti White, Pear Pizzazz, Peach Parfait
Inks - Old Olive, Tangerine Tango
Stamps - Longfellows
Tools - Aqua Painters (£12.25 for two)

I'll be back soon with pictures from yesterday's Scrapbook class. Thanks for looking!

Sarah :o)