Upcoming Classes

Thursday 9th June: 10.00-12.30: Cardmaking.. cards for men using the Plane & Simple stamp set.
Thursday 23rd June: 9.30-12.30: Scrapbooking.. we'll be continuing with our 8"x8" mini book, theme: Book of Me!

Thursday 26 August 2010

I'm Learning Something New - Are You?


If you've popped over to see me via my Paper Obsession blog, you're very welcome - thanks so much for coming!! If you're not.. and are wondering what this is all about.. it's an online scrapbooking class by Shimelle Laine which starts on 1st September - click the picture to find out more! As I mentioned over on Paper Obsession, I'm introducing a special offer for the whole of September.

If you love - and would like to buy - any of the products I'm using on my 'Learn Something New' album, I will happily order them for you and have them sent straight to your home.

Normally, the shipping & handling charge per order is a minimum of £3.95, or 5% of your order total. However, for the month of September I am offering FREE shipping & handling on all orders over £25! (UK only I'm afraid).

If you're new to Stampin' Up!, why not have a little look through the Idea Book & Catalogue, or the Mini-Catalogue (click the pictures in the side-bar to download a copy). You'll see they are both full to the brim with beautiful ideas and fabulous products for card-making and scrapbooking.

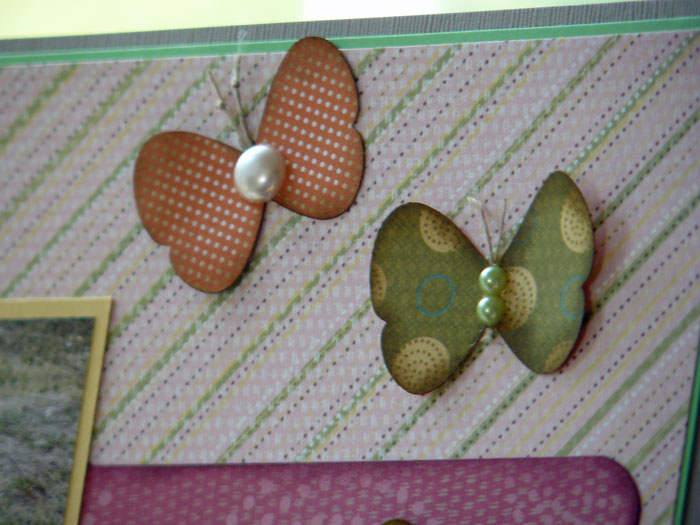
Here's my front cover of this year's Learn Something New project, showing off a variety of SU! stamps and chipboard alphas (full details on my Paper Obsession blog, here).


You may be aware that the brand-new Idea Book & Catalogue comes out on 1st October, and many of the items in the current catalogues will be retiring (the retiring list will be available from 1st September). So if you do see anything you like, don't delay.. it might not be around for long!

If you would like to order anything, just drop me an email on slpiggott73@gmail.com with your requirements and I'll get back to you fast!

Sunday 22 August 2010

Colour Inspiration

Inspiring colour combinations can pop up when you least expect it.. shopping in Waitrose a couple of weeks ago, I spotted a little selection pack of Houmous pots in the most delicious colours - so, naturally, I had to buy it!


I've had this bit of packaging stuck on my wall for a while now, waiting for a chance to use the colour combination. So this morning I used it to make a card for my Father-in-law whose birthday is tomorrow:


The colours I used are Ruby Red, Rich Razzleberry and Old Olive.

Supplies:
Stamps - Darling Dots, Basic Phrases, Just Perfect
Inks - Ruby Red, Rich Razzleberry, Old Olive, Soft Suede
Punches - Scallop Circle, 1 1/2" Circle, 1" Circle

The Houmous was pretty tasty too, by the way.. :o)

Sarah x

Thursday 19 August 2010

Dabbling in the dirt

So, the Blog Hop on Sunday went less smoothly than the first one.. I'm so sorry if you tried to get round to see everyone's pages and came across problems here and there.. Nonetheless, there were again some beautiful scrapbook layouts to see and inspiring ideas to file away for future use!

I'd just like to share a page I made last week - it's of my two boys and their little friend, thoroughly absorbed in their game in a patch of dirt in the garden. Simple pleasures!


The papers are from the versatile Sweet Pea Designer Series Paper stack (£19.50 for 48 double-sided sheets - from the mini-catalogue). If you read this post last Saturday, you'll have seen close-ups of the chipboard lettering (On Board Loads of Letters - £10.25 for three 12x12" sheets) and the orange-red 'Friends' embellishment, made using the beautiful Vintage Vogue stamp set (£19.95 - from the mini-catalogue).

Here's a close-up of those butterflies:


These were punched, using the Butterfly punch (£12.50) from scraps of Sweet Pea papers, inked with Soft Suede ink and given antennae made from small pieces of Linen Thread (£3.25 for 13.7 metres). The gems are non-SU! but are very similar to those available in the Stampin' Up! Pretties Kit (£23.25 for a huge selection of flowers, pearls, beads and other lovely pieces).

If you are interested in buying any of the above products - or any others, of course - please don't hesitate to contact me and I'll be delighted to help you.

Thanks for visiting,

Sarah x

Sunday 15 August 2010

Two-Step Stampin' Blog Hop - Part 2!

Thank you so much for dropping by.. If you're here for the Blog Hop, you've come to the right place! If you've stumbled upon me by accident, well you're most welcome!

In a nutshell, I and some lovely ladies at In Love With Stamping arranged this little event to celebrate Stampin' Up!'s August promotion - 20% off selected Two-Step Stampin' Stamp sets... click the picture to the right to find out more. The focus is on using these stamps on your scrapbook layouts.

Here's the running order of today's hop, along with the stamp sets you can expect to see in action:

1. Sarah (SarahLP) - Bird on a Branch & Greenhouse Garden (that's me!)

2. Helen (langara) - Something Sweet

3. Anthea (scrappydiva) - Greenhouse Garden

4. Caz (stampingcaz) - Big Bold Birthday

5. Rachel - Trendy Trees

6. Caroline Skinner - Tiny Tags & Loads of Love

7. Jo (Scrapbookparty) -Something Sweet


8. Kara (KaraM) - Big Bold Birthday and Greenhouse Garden

9. Sue (Frankiesue) - Trendy Trees


So here's my page...


The layout is based on a sketch from this month's Scrapbook Magazine. If you read my previous post, you'll recognise those chipboard letters.. :o) 

Here's the Bird on a Branch in more detail:


I stamped the Bird with So Saffron ink and used a Sponge Dauber to add Ruby Red to the head and tail.


And here are the Greenhouse Garden flowers in close-up:


I used the 'rock & roll' technique to darken the edges of the red flower, then added some Champagne Shimmer Paint with a Dauber to the centre of the flower (and the journaling spot.. oh, and the branch the bird is sitting on.. once you start adding Shimmer it's hard to stop!).


I hope you enjoyed your visit.. I'd be delighted to read your comments if you have a moment.. By the way, if you missed the first Blog Hop on 1st August, you'll find it here

OK, now your next stop on the Hop is Helen... have a lovely time!


Sarah x

Saturday 14 August 2010

Ideas for Scrapbook Title Lettering... Part 1

Three products I can't be without at the moment for scrapbooking are the On Board Loads of Letters (three 12x12" sheets of bare chipboard letters - £10.25), Sponge Daubers (12 for £7.75) and Crystal Effects (£4.95). I've used them on my last few scrapbook pages and can see them featuring again and again!

On some pages, naked chipboard letters will look just right - clean, natural, understated.. but on other occasions you might want to match your alphas to your colour scheme. The easiest way I have found to colour my chipboard is to simply press the letter (or shape) into an ink pad. Press all over with your finger, then lift it up to check the coverage. Repeat until the letter is covered to the intensity you want. In the example below, I pressed really firmly into the ink pad for an intense effect. If you want to cover the edges, you could use a Blender Pen or a cotton bud to take up some ink and dab it round the edges and into all the little crevices.


You can get a lovely two-tone look by pressing just half of your chipboard shape down onto your first inkpad, then repeating with the other half on a second colour. Make sure you start with the lighter colour of ink to avoid contaminating pale inkpads with dark ink.


In the example above, when the ink was dry I added Champagne Shimmer Paint using a Sponge Dauber to add a delicate touch of sparkle to my title.

Sponge Daubers are a brilliantly versatile tool! They are great for picking up colour from an ink pad and creating distressed inky effects on the edges of cardstock, patterned paper.. and your chipboard letters! In the following example, I started by colouring the letters with Pretty in Pink ink. Once dry, I dabbed them with a Sponge Dauber coated in Soft Suede ink for a dirty, muddy effect.


See those little 'raindrops' on these letters..? These are tiny drops of Crystal Effects applied to look like splashes of water.

You can also completely coat your chipboard with Crystal Effects for a dimensional, glossy look. In the following example - a chipboard heart - I coloured with Ruby Red ink, allowed to dry, then carefully applied Crystal Effects all over. be warned - you need to let it dry thoroughly before attempting to stick it to your layout!


I've also applied Crystal Effects to the letter F (from Vintage Vogue set) to produce a shiny, raised effect. {Incidentally, I achieved the two-tone effect by inking the stamp first with So Saffron ink, then adding Ruby Red ink with a Sponge Dauber!}

I hope you've found this useful.. and if you'd like to purchase any of the products featured above, don't hesitate to get in touch.

Look out for Part 2 - Using Alphabet Stamps in your Titles - coming soon.


Meanwhile - there'll be another Stampin' Scrapping Blog Hop tomorrow - Sunday 15th August - starting HERE at 10:00am.. I hope you'll check it out - it's sure to be fabulous!

Monday 9 August 2010

More Christmas Cards with 'Dasher'

I love the Dasher stamp! And in preparation for my next class on Friday, I've been making a few Dasher-based Christmas cards.


You may recognise the Old Olive one at the back.. I made that one a few weeks ago.. but the two at the front are new! As before, the inspiration for these cards was from Carolyn, a fellow SU! demonstrator - you can see her boxed set of cards here.


Supplies:
Stamps - Dasher, Sincere Salutations
Cardstock - Rich Razzleberry, Basic Black, Whisper White, Soft Suede
Punches - Oval, Scallop Oval
Ink - Basic Black, Soft Suede
Other - Champage Shimmer Paint, Sponger Daubers, Black & White Striped Grosgrain Ribbon, Soft Suede Polka Dot Ribbon, Diamond Stickles (non-SU!)

And finally, a couple more Dasher cards made to a different recipe:


Supplies:
Stamps - Dasher, Punches Three, So Swirly Jumbo Wheel
Cardstock - Soft Suede, Pretty in Pink, Rich Razzleberry, Bashful Blue, Whisper White, Very Vanilla
Punches - Scallop Edge, Scalloped Oval, Corner Rounder (non-SU)
Ink - Soft Suede, Rich Razzleberry, Bashful Blue
Other - Soft Suede Polka Dot Ribbon, Diamond Stickles (non-SU)

The first of these two was inspired by a card made by Pat, and the second one was inspired by Carol's use of the So Swirly wheel on the In Love With Stamping gallery. Thanks for sharing your cards, ladies!

So, which card do you like the best?

Sarah x

Stampin' Up! Open House - Saturday 25th September

There's an exciting event coming up which I'm thrilled to tell you about.. I'm holding a Stampin' Up! Open House event on Saturday 25th September. It's going to be held at Community Wise in Eastbourne from 10am til 12.30pm, timed to coincide with the monthly Farmers' Market and Craft Fair... so there will be plenty of great reasons to come along and pay us a visit!

The Open House will be held in the large hall upstairs at Community Wise (it will be signposted!). There will be displays of scrapbook layouts, mini-books, cards, three-dimensional projects such as gift boxes and gifts, and home decor items. Along with my friend and fellow demonstrator Pat, we'll be holding demonstrations and 'Make-and-Take' sessions - there will be free goodie bags for anyone who signs up for a session in advance.

If you'd like to join in a Make-and-Take session, please email me to reserve your place. There will be two sessions - 10.30am and 11.30am, each lasting 20-30 minutes. There will be small charge of £1 for the Make-and-Take sessions which will include all you need to make a beautiful card, plus an envelope!


We'll also be holding a Raffle - fill in the Door Prize form and you'll be in with a chance of winning a lovely Stampin' Up! goodie bag.

I hope you can come - Pat and I would love to see you there!


Sarah x

Thursday 5 August 2010

A Two-step Stampin' Anniversary Card

On Friday 30th July, my hubby and I celebrated our 5th wedding anniversary. Rather than go out for a romantic dinner for two, as originally planned, we decided to take the boys away for a camping weekend. That's a story for another day.. and another blog.. Meanwhile, here's the card I made for Gareth..


Supplies:
Cardstock - Kraft, Almost Amethyst, Very Vanilla
Stamps - Bird on a Branch, Fun & Fast Notes
Inks - Almost Amethyst, Perfect Plum, Pale Plum, Lavender Lace, Ruby Red, Close to Cocoa
Other - Linen Thread

Techniques:
  • I used the Stamp-a-ma-jig to position the flowers precisely on the branch.
  • The flower stamp on the main image was inked with a combination of inks to give a variety of colours.
  • I used the 'rock & roll' technique to ink up the purple bird first with Almost Amethyst, then rolled the Perfect Plum ink pad along the head and tail of the bird.
  • I stamped the greeting by masking off each word in turn with a Post-it Note and using the Stamp-a-ma-jig to get each word exactly where I wanted it.
  • The birds were stamped on Very Vanilla cardstock, cut out and the purple one mounted on a foam pad, overlapping the red one.
Thanks for looking!

Sarah x

Sunday 1 August 2010

Welcome to the Two-Step Stampin' Scrappin' Blog Hop!!


Happy Sunday.. it's 1st August, which means Stampin' Up!'s 'Two-Step into Fabulous' special promotion starts today! As explained in my previous post, Stampin' Up! are offering a delicious 20% off selected Two-Step Stampin' sets from 1st to 31st August.

In Two-Step Stamping, an image is made up from two separate stamps. This enables the two parts of the image to be stamped in different colours, or shades of the same colour, giving the image that extra dimension and impact!

Though fantastic for card-making, these stamps sets are also perfect for your scrapbooking - and today I'd like to present a very special Two-Step Stampin' Scrappin' Blog Hop to show you how these lovely sets can be used on your layouts.

We have ten blogs for you to work your way round, starting here! Each blog will contain a link to the next one on the Hop.. but if there are any problems with links, you'll find the full list at the end of this post.

Meanwhile, here's my scrapbook page:


All of the papers used are from the Sweet Pea Designer Paper stack. I stamped the Greenhouse Garden flowers, starting with a pale colour, then rolling the edges over a darker ink pad to add some contrast (this is called the 'rock & roll' technique!). I then used the Stamp-a-ma-jig tool to perfectly align the second stamp on top of the first. This adds the darker details to the flowers.


I added glitter glue to the flower centres, curled them a little, then mounted them on foam pads. The chipboard letters were pressed onto a Cameo Coral inkpad, then covered in glitter glue.

I made the tags from scraps of Sweet Pea papers, rounding the corners and inking the edges. The scalloped part was made using the Scallop Oval punch and folding in half. 'Photo' was stamped with the Just Perfect alphabet stamps. I love this set - it's just perfect for titles!


OK.. so your next stop on the Hop is to Stamping Scene, where Zoe will be using Greenhouse Garden and Big Bold Birthday stamp sets.

In case you get lost on the way, the full list is below:


1. Seaside Stampers (Sarah) - Greenhouse Garden
2. Stamping Scene (Zoe) - Greenhouse Garden
3. Creativity Is Key (Emma) - Loads of Love
4. Cards and Creations (Pat) - Trendy Trees
5. Stampin' the City (Cheryl) - Bird on a Branch and Tiny Tags
6. Taylor-Made Cards (Debbi) - Trendy Trees and Tiny Tags
7. Make, Do and Gem (Gemma) - Greenhouse garden
8. Tea Cup Designs (Karin) - Loads of Love
9. Stampaholix (Carolyn) - Greenhouse Garden
10. Feeling Crafty (Bekka) - Greenhouse Garden, Tiny Tags and Bird on a Branch

Have fun, and thanks so much for your visit!!

Sarah x


P.S. There'll be another Hop on 15th August.. hope to see you then!